A modern, flexible UI builder framework for FHEM home automation.
Built with a clear intention: Keep it short and simple!
Version 3 - Built with Web Components using pure ES2020 JavaScript.
⚠️ Important Notes:
- This version is not compatible with older FTUI versions (v1/v2)
- Supports multiple backends: FHEM and Home Assistant
- Active development - new features are continuously added

- Installation
- Backend Configuration
- Update
- Docker Setup
- Development
- Usage
- Binding
- Pipes
- Colors
- Components
- Examples
- Support & Donation
- License
-
Download and extract FTUI:
wget https://github.com/knowthelist/ftui/tarball/master -O /tmp/ftui.tar
cd /tmp && tar xvzf /tmp/ftui.tar
mv /tmp/knowthelist-ftui-*/www/ftui /opt/fhem/www
-
Customize your page:
- Edit
index.htmlaccording to your needs - Add your FHEM devices and readings
- Edit
-
Access your UI:
- Open in browser:
http://<fhem-url>:8083/fhem/ftui/index.html
- Open in browser:
FTUI supports two powerful backends that can be used independently or simultaneously:
FTUI works out-of-the-box with FHEM. Simply ensure your FHEM instance is running and accessible.
If your FHEMWEB instance is protected by HTTP authentication and FTUI shows an error like GET https://<servername>:8083/fhem/?XHR=1 401 (Authorization Required), then the browser is not authenticated for the FHEMWEB endpoint that FTUI is using.
FTUI does not currently send a custom Authorization header for FHEM requests on its own. In practice that means one of these setups is required:
- Open the FHEMWEB URL in the browser first and complete the authentication challenge there, then load the FTUI page in the same browser session.
- Serve FTUI from the same authenticated FHEMWEB origin so the browser can reuse that authenticated session.
- Put FTUI/FHEMWEB behind a reverse proxy that handles authentication before the request reaches FTUI.
- Expose a dedicated FHEMWEB instance or path for FTUI that is reachable without HTTP auth but still protected appropriately at the network level.
If FTUI should talk to a specific FHEMWEB path, set it explicitly in the page header:
<meta name="fhemweb_url" content="https://servername:8083/fhem/">Important notes:
- The
fhemweb_urlvalue must point to the exact FHEMWEB endpoint FTUI should use. - A
401on?XHR=1means the authentication step failed before FTUI could talk to FHEM. - If you use a reverse proxy, make sure WebSocket upgrade requests are forwarded as well, because FTUI also uses a WebSocket connection for updates.
Home Assistant support stays dormant unless FTUI sees valid Home Assistant configuration and actual HA bindings.
If you are a FHEM-only user, leave homeAssistant.enabled at false or omit the homeAssistant block entirely in config.local.js.
Example usage:
<ftui-label [text]="WeatherDevice:temperature" unit="°C"></ftui-label>
<ftui-switch [(value)]="lamp1"></ftui-switch>
<ftui-button (value)="dummy1">Toggle</ftui-button>To connect FTUI to Home Assistant, you need to configure CORS and create an access token.
Activation checklist:
- Add
enabled: trueinconfig.local.js - Set a valid Home Assistant
url - Set a valid long-lived
token - Use
ha:prefixed entities in your HTML
-
Configure CORS in Home Assistant
Add the following to your
configuration.yaml:http: cors_allowed_origins: - http://fhem.home.arpa:8083 - http://fhem:8083 - http://localhost:8083 use_x_forwarded_for: true trusted_proxies: - 172.168.101.0/24
-
Create a Long-Lived Access Token
- In Home Assistant, go to: Profile → Security → Long-lived access tokens
- Click "Create Token"
- Give it a meaningful name (e.g., "FTUI Access")
- Copy the generated token
-
Configure FTUI
Create a config.local.js file in your FTUI installation directory (www/ftui/config.local.js):
export const config = {
    homeAssistant: {
        enabled: true,
        url: 'http://homeassistant:8123',
        token: 'YOUR_LONG_LIVED_ACCESS_TOKEN_HERE',
    },
};
Note: You can also edit
config.jsdirectly, but usingconfig.local.jsis recommended to avoid conflicts during updates. After changingconfig.local.js, reload the browser page.
Required switches:
enabled: trueturns on Home Assistant support for pages that useha:bindings.urlmust point to your Home Assistant instance.tokenmust be a Home Assistant long-lived access token.- Leave
enabled: falsefor FHEM-only setups.
-
Use Home Assistant in HTML
Prefix all Home Assistant entities with
ha::<ftui-label [text]="ha:weather.forecast_home:temperature" size="3" unit="°C"></ftui-label> <ftui-label [text]="ha:weather.forecast_home:humidity" size="3" unit="%"></ftui-label> <ftui-switch [(value)]="ha:light.living_room"></ftui-switch> <ftui-knob [value]="ha:sensor.outdoor_temperature" [color]="ha:sensor.outdoor_temperature | step('-99: blue, 10: ok, 20: warning, 25: danger')" width="130" offset-y="10" type="handle" min="-10" max="40" decimals="1" unit="°C" readonly has-value-text> </ftui-knob>
-
Access Your Page:
- Open the dedicated HA example:
http://fhem:8083/fhem/ftui/examples/ha.html - Additional generic HA examples:
http://fhem:8083/fhem/ftui/examples/ha-basic.htmlandhttp://fhem:8083/fhem/ftui/examples/ha-mobile.html - Pages with
ha:bindings requireenabled: true,url, andtoken. - Private local dashboards should use the underscore convention in the FTUI root, for example
http://fhem:8083/fhem/ftui/_mobile_full.html. - Private partials can also use underscore names, for example
_mobile-solar.html. - If you see
Home Assistant support is disabled, thenenabled: trueis missing. - If you see
Home Assistant is not fully configured, thenurlortokenis missing or invalid.
FTUI can communicate with both FHEM and Home Assistant simultaneously! This is perfect if you're migrating between systems or want to use the best features of both platforms.
export const config = {
    homeAssistant: {
    enabled: true,
        url: 'http://homeassistant:8123',
        token: 'YOUR_HA_TOKEN_HERE',
    },
    // FHEM is automatically detected from the web server
};<!-- FHEM devices -->
<ftui-label [text]="FHEMWeather:temperature" unit="°C"></ftui-label>
<ftui-button (value)="FHEMDummy">FHEM Device</ftui-button>
<!-- Home Assistant devices -->
<ftui-switch [(value)]="ha:light.bedroom"></ftui-switch>
<ftui-label [text]="ha:sensor.temperature" unit="°C"></ftui-label>
<!-- Combined example -->
<ftui-grid base-width="100" base-height="100">
<ftui-grid-tile row="1" col="1">
<ftui-row>
<ftui-column>
<h3>FHEM Devices</h3>
<ftui-button (value)="lamp1">FHEM Lamp</ftui-button>
</ftui-column>
<ftui-column>
<h3>Home Assistant</h3>
<ftui-switch [(value)]="ha:light.kitchen"></ftui-switch>
</ftui-column>
</ftui-row>
</ftui-grid-tile>
</ftui-grid>Key Points:
- Use no prefix for FHEM devices:
devicename:reading - Use
ha:prefix for Home Assistant:ha:entity.name - Both backends update in real-time
- Pipes and bindings work with both backends
To update FTUI to the latest version via FHEM:
update all https://raw.githubusercontent.com/knowthelist/ftui/master/controls_ftui.txt
Enter this command in the FHEM command field of FHEMWEB.
You can host FTUI on your own web server using Docker instead of via FHEMWEB.
-
Pull the Docker image:
docker pull knowthelist/ftui
-
Prepare your index.html:
- Place your customized
index.htmlin an accessible location - Add the FHEMWEB URL to the
<head>section:<meta name="fhemweb_url" content="http://<your_fhem_url>:8083/fhem/">
- Place your customized
-
Run the container:
docker run -d \
  -p 8080:80 \
  -v <path>/index.html:/usr/share/nginx/html/index.html \
  --name ftui3 \
  knowthelist/ftui
-
Access your UI:
- Open in browser:
http://<docker_host>:8080
- Open in browser:
version: '3.8'
services:
  ftui:
    image: knowthelist/ftui
    container_name: ftui3
    ports:
      - "8080:80"
    volumes:
      - ./index.html:/usr/share/nginx/html/index.html
restart: unless-stoppedFor developers who want to contribute or customize FTUI:
-
Clone the repository:
cd ~
git clone https://github.com/knowthelist/ftui.git
-
Link to FHEM's www directory:
ln -s $HOME/ftui/www/ftui /opt/fhem/www/ftui_dev -
Access the development version:
- Open:
http://<fhem-url>:8083/fhem/ftui_dev/index.html
- Open:
-
Snippet Tester:
- Test components live:
http://<fhem-url>:8083/fhem/ftui_dev/ftui-snippet-tester.html - Paste HTML snippets and see them rendered in real-time
- Test components live:
Add FTUI web components to your HTML code. Components support powerful data binding and real-time updates.
Button:
<ftui-button (value)="dummy1">on/off</ftui-button>Label:
<ftui-label [text]="dummy1"></ftui-label>Icon with dynamic properties:
<ftui-icon
    [name]="dummy1 | map('on: lightbulb-on, off: lightbulb')"
    [color]="temperature | step('0: success, 50: warning, 80: danger')">
</ftui-icon>FTUI uses a powerful data binding system inspired by modern frameworks. Bindings connect your HTML elements to FHEM/Home Assistant data sources.
<ftui-label color="danger">demo</ftui-label>Updates the UI when the backend reading changes.
Long format:
<ftui-label get-color="dummy1:color">demo</ftui-label>Short format (recommended):
<ftui-label [color]="dummy1:color">demo</ftui-label>[attribute]="DEVICE:READING:PROPERTY"
- DEVICE: Name of the FHEM/HA device (e.g.,
lamp1,WeatherLocal,ha:light.bedroom) - READING: Name of the reading (e.g.,
state,temperature) - Default:STATE - PROPERTY: Property of the reading - Default:
valuevalue- The current valuetime- Timestamp when the reading was setupdate- Last update timestamp in FTUIinvalid-trueif reading doesn't exist
Example - Show timestamp:
<ftui-label [text]="WeatherLocal:state:time | toDate() | format('HH:mm:ss')"></ftui-label>Set HTML attributes dynamically:
<ftui-label [attr.data-my]="dummy1:status">demo</ftui-label>Updates the backend when UI changes.
Long format:
<ftui-button set-value="dummy1"></ftui-button>Short format (recommended):
<ftui-button (value)="dummy1"></ftui-button>Synchronizes both directions automatically.
Long format:
<ftui-button getset-value="dummy1"></ftui-button>Short format - "Banana in a Box" (recommended):
<ftui-button [(value)]="dummy1"></ftui-button>The device name local is reserved for client-side binding that doesn't sync with backends.
<link href="themes/mobile-dark-theme.css" rel="stylesheet"
      ftui-binding [disabled]="local:dark">
Built-in local variables:
local:dark- Automatically set totruewhen OS switches to dark mode
Components provide events that trigger on attribute changes. The $event object contains a detail property with the changed data.
<ftui-colorpicker @color-change="console.log($event.detail.hexString)"></ftui-colorpicker><ftui-dropdown
[list]="deviceList:list"
[(value)]="selectedDevice"
@value-change="console.log('Selected:', $event.detail)">
</ftui-dropdown>Use events to communicate between components and trigger custom JavaScript.
Binding values can be transformed using pipe functions. Multiple pipes can be chained together.
| Pipe | Description | Example |
|---|---|---|
part(number) |
Extract part of string by index | "one two three" | part(1) → "two" |
toDate(format) |
Convert to date object | "2024-01-15" | toDate() |
toBool() |
Convert to boolean | "1" | toBool() → true |
toInt() |
Convert to integer | "3.14" | toInt() → 3 |
toNumber() |
Convert to float | "3.14" | toNumber() → 3.14 |
format(string) |
Format date/time | date | format('YYYY-MM-DD HH:mm') |
humanized() |
Human-readable duration | 3600 | humanized() → "1 hour" |
round(decimals) |
Round number | 3.14159 | round(2) → 3.14 |
fix(decimals) |
Fixed decimal places | 3.1 | fix(2) → "3.10" |
roundMoney() |
Format as currency | 1234.5 | roundMoney() → "1,234.50" |
slice(start, end) |
Extract substring | "hello" | slice(0,2) → "he" |
encode() |
URL encode | "hello world" | encode() → "hello%20world" |
add(number) |
Add to value | 10 | add(5) → 15 |
multiply(number) |
Multiply value | 5 | multiply(2) → 10 |
divide(number) |
Divide value | 10 | divide(2) → 5 |
replace(find, replace) |
Replace text | "hello" | replace('h', 'H') → "Hello" |
map('in:out,...') |
Map values | "on" | map('on:green,off:red') → "green" |
filter('val,val,...') |
Filter matching values | "test" | filter('test,demo') → "test" |
step('val:out,...') |
Step-based mapping | 15 | step('0:cold,10:ok,20:warm') → "ok" |
scale(minIn,maxIn,minOut,maxOut) |
Scale value range | 50 | scale(0,100,0,255) → 127.5 |
ago() |
Time ago | timestamp | ago() → "2 hours ago" |
till() |
Time until | timestamp | till() → "in 3 hours" |
timeFormat(format,inputMode,formatMode) |
Format time | 3661 | timeFormat('HH:mm:ss') → "01:01:01" |
minusBlue(threshold) |
Return blue if below threshold | 5 | minusBlue(10) → "blue" |
contains(value) |
Check if contains value | "hello" | contains('ell') → true |
not() |
Logical NOT | true | not() → false |
is(value) |
Check equality | "on" | is('on') → true |
isNot(value) |
Check inequality | "on" | isNot('off') → true |
pad(count, char) |
Pad string with character | "5" | pad(3,'0') → "005" |
append(text) |
Append text | "hello" | append(' world') → "hello world" |
prepend(text) |
Prepend text | "world" | prepend('hello ') → "hello world" |
capitalize() |
Capitalize first letter | "hello" | capitalize() → "Hello" |
<!-- Chain multiple pipes -->
<ftui-label [text]="WeatherLocal:state | part(4) | toInt() | multiply(2) | round(1)"></ftui-label>

<!-- Map values to text -->
<ftui-icon [name]="lamp:state | map('on:lightbulb-on,off:lightbulb')"></ftui-icon>

<!-- Step-based color -->
<ftui-label
    [text]="temperature"
    [color]="temperature | step('0:blue,10:green,20:yellow,30:red')">
</ftui-label>

<!-- Format timestamp -->
<ftui-label [text]="sensor:state:time | toDate() | format('DD.MM.YYYY HH:mm')"></ftui-label><!-- Remove # from color before sending -->
<ftui-colorpicker (hex)="HUEDevice:rgb | replace('#','')"></ftui-colorpicker>
<!-- Scale slider value -->
<ftui-slider (value)="dimmer:pct | scale(0,100,0,255)"></ftui-slider>FTUI provides a comprehensive color palette with named colors for consistent theming.
Color values shown are from the default ftui-theme. Available themes may use different values.
Main Colors:
primary- #20639b - Primary brand colorsecondary- #173f5f - Secondary accent colorlight- #bfbfbf - Light theme colormedium- #5d5d5d - Medium graydark- #3f3f3f - Dark theme color
Status Colors:
success- #05aaad - Positive/success statewarning- #eeca82 - Warning/caution statedanger- #db5d3a - Error/danger state
Alternative Status:
ok- Same assuccesserror- Same asdanger
Spectrum Colors:
red- #db5d3aorange- #f8b13eyellow- #eeca82green- #05aaadblue- #3062a0violet- #9400d3
Neutral Colors:
white- #fffblack- #000gray- Same asmediumbrown- #bf7a37grid- Inherits from grid tile backgroundtranslucent- Semi-transparent overlay
FTUI includes several pre-built themes. Include them in your HTML <head>:
Default Theme (Dark):
<link href="themes/ftui-theme.css" rel="stylesheet">Bright Theme (Light):
<link href="themes/bright-theme.css" rel="stylesheet">Clean, bright interface with light backgrounds. Colors: Primary #3880ff, Success #32a054, Danger #ed553b
Vivid Theme (Vibrant):
<link href="themes/vivid-theme.css" rel="stylesheet">High-contrast vibrant colors. Colors: Primary #007bff, Success #28a745, Warning #ffc107
Retro Theme:
<link href="themes/retro-theme.css" rel="stylesheet">Classic retro styling with warm tones.
Mobile Themes:
<!-- Light mobile theme -->
<link href="themes/mobile-theme.css" rel="stylesheet">

<!-- Dark mobile theme -->
<link href="themes/mobile-dark-theme.css" rel="stylesheet">

<!-- iOS-inspired theme -->
<link href="themes/mobile-ios.css" rel="stylesheet"><ftui-button color="primary">Primary Button</ftui-button>
<ftui-label color="danger">Error Message</ftui-label>
<ftui-icon name="warning" color="warning"></ftui-icon>
<!-- Dynamic color based on value -->
<ftui-label
[text]="temperature"
[color]="temperature | step('0:blue,15:green,25:yellow,30:red')">
</ftui-label>
<!-- Multiple colored components -->
<ftui-row>
<ftui-button color="success">Success</ftui-button>
<ftui-button color="warning">Warning</ftui-button>
<ftui-button color="danger">Danger</ftui-button>
</ftui-row>FTUI provides a rich set of web components for building interactive UIs.
- Tab - Tabbed navigation
- Grid - Responsive grid layout
- Circlemenu - Circular menu
- Row - Horizontal layout container
- Column - Vertical layout container
- Cell - Grid cell container
- View, ViewStage, ViewSection, ViewItem - View hierarchy for mobile UIs
- Swiper - Touch-enabled slider/carousel
- Label - Text display with formatting
- Icon - Icon display with color and size options
- Image - Image display with auto-refresh
- Badge - Notification badges
- Clock - Time display
- Weather - Weather information display
- Button - Interactive button
- SegmentedButton - Multi-option button group
- Knob - Rotary knob control
- Slider - Linear slider control
- Checkbox - Toggle checkbox
- Dropdown - Selection dropdown
- Colorpicker - Color selection tool
- Chart - Charts and graphs (powered by Chart.js)
- Medialist - Media list display
- Solar Flow - Energy flow visualization for solar, battery, grid, and home power
- Speak - Text-to-speech output
Note: All components support the following common attributes:
hidden- Hide componentdisabled- Disable interactionreadonly- Read-only modemargin- Outer spacingpadding- Inner spacing
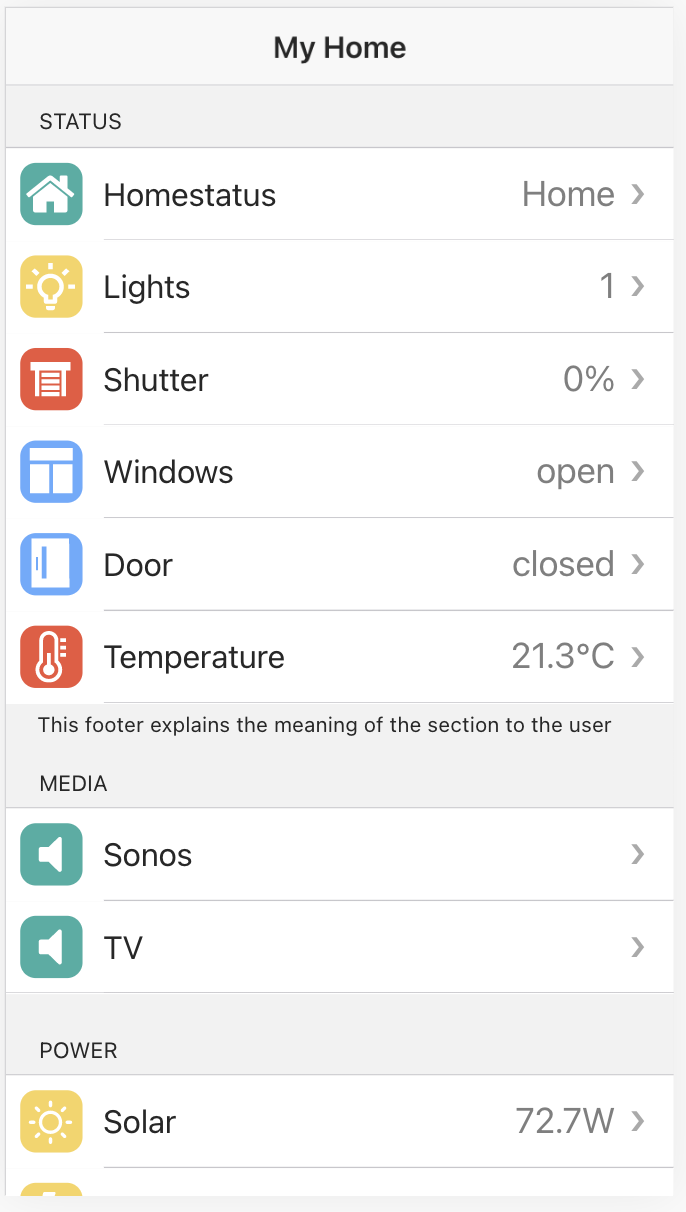
FTUI is perfect for creating responsive mobile interfaces using the ftui-view component.
Interactive buttons with multiple states and styles.
| Attribute | Description | Type | Default |
|---|---|---|---|
| color | Color palette selection | "primary" | "secondary" | "success" | "warning" | "danger" | "light" | "medium" | "dark" |
"primary" |
| fill | Button fill style | "clear" | "outline" | "solid" |
"solid" |
| size | Button size | "small" | "normal" | "large" |
"normal" |
| shape | Button shape | "round" | "normal" | "circle" |
"normal" |
| value | Current state value | String | "off" |
| states | Available states (comma-separated) | String | "on,off" |
Example:
<ftui-button color="success" fill="solid" shape="round" [(value)]="lamp1">
    Toggle Light
</ftui-button>Display text with formatting options.
| Attribute | Description | Type | Default | Example |
|---|---|---|---|---|
| text | Text to display | String | "" |
|
| color | Text color | Color name | "" |
"danger" |
| unit | Unit suffix | String | "" |
"°C" |
| interval | Auto-reload interval (seconds) | Number | 0 |
60 |
| size | Font size | Number | String | 0 |
3 or "80%" or "12px" |
When size is a number, it maps to these font sizes:
| Size | Font Size | Size | Font Size |
|---|---|---|---|
| -4 | 0.125em | 0 | 1em |
| -3 | 0.25em | 1 | 1.25em |
| -2 | 0.5em | 2 | 1.5em |
| -1 | 0.75em | 3 | 1.75em |
| 4 | 2em | ||
| 5 | 2.5em | ||
| 6-12 | 3em-12em |
Size can also be specified as %, px, or em strings.
Examples:
<ftui-label [text]="temperature" size="3" unit="°C" color="primary"></ftui-label>
<ftui-label text="System Status" size="80%" color="success"></ftui-label>
<ftui-label [text]="sensor:state" size="12px"></ftui-label>Display images with refresh capabilities.
| Attribute | Description | Type | Default |
|---|---|---|---|
| base | Base URL path | String | "" |
| src | Image filename or full URL | String | "" |
| width | Image width | Number | "auto" |
"auto" |
| height | Image height | Number | "auto" |
"auto" |
| interval | Auto-reload interval (seconds) | Number | 0 |
| refresh | Reload trigger attribute | String | "" |
| nocache | Bypass cache | Boolean | false |
Examples:
<!-- Simple image -->
<ftui-image src="weather.png" width="200"></ftui-image>

<!-- Auto-refresh every 30 seconds -->
<ftui-image src="camera/snapshot.jpg" interval="30" nocache></ftui-image>

<!-- Refresh on device change -->
<ftui-image
    base="/fhem/images/"
    src="floorplan.png"
    [refresh]="motion_sensor:state">
</ftui-image>Visualize power flow between solar input, battery, inverter, home, and grid.
Use kebab-case HTML attributes for component properties. For example, maxInverterPower in the component is configured as max-inverter-power in markup, and maxGridPower is configured as max-grid-power.
The soc attribute now renders correctly even when the value is exactly 100, so no binding workaround like | add(1) is needed.
Example:
<ftui-solar-flow
  [solar-power]="Zendure_Hub2000:properties_solarInputPower"
  [soc]="Zendure_Hub2000:properties_electricLevel"
  [inverter-power]="Zendure_Hub2000:properties_outputHomePower"
  max-inverter-power="6000"
  [home-power]="LeistungGesamt:state"
  [grid-power]="SmartMeter:GS303_Power_cur"
  max-grid-power="5000"
  [battery-current]="Zendure_Hub2000:BatCurrent"
  [grid-input-power]="Zendure_Hub2000:properties_gridInputPower">
</ftui-solar-flow>Display notification badges that disappear when empty.
| Attribute | Description | Type | Default |
|---|---|---|---|
| color | Badge color | Color name | "primary" |
| text | Badge content | String | "" |
Examples:
<!-- Static badge -->
<ftui-badge text="5" color="danger"></ftui-badge>

<!-- Dynamic notification count -->
<ftui-badge [text]="notifications:count" color="warning"></ftui-badge>Text-to-speech synthesis using the Web Speech API.
| Attribute | Description | Type | Default |
|---|---|---|---|
| lang | Language code | "en-US" | "de-DE" | etc. |
User agent default |
| pitch | Voice pitch (0.0-2.0) | Float | 0.9 |
| rate | Speech rate (0.1-10) | Float | 1.0 |
| volume | Volume (0.0-1.0) | Float | 1.0 |
| text | Text to speak | String | "" |
Examples:
<!-- Announce temperature changes -->
<ftui-speak
    lang="en-US"
    rate="1.2"
    [text]="temperature | format('Temperature is now {0} degrees')">
</ftui-speak>

<!-- German announcement -->
<ftui-speak
    lang="de-DE"
    pitch="1.0"
    [text]="doorbell:state | map('on:Jemand ist an der Tür')">
</ftui-speak>Advanced color selection supporting RGB, HSL, and hex formats.
| Attribute | Description | Type | Default |
|---|---|---|---|
| hex | RGB hex value (#ffffff) | String | "" |
| hue | Hue (0-360) | Number | 0 |
| saturation | Saturation (0-100) | Number | 0 |
| brightness | Brightness (0-100) | Number | 0 |
Examples:
<!-- Simple hex color picker -->
<ftui-colorpicker [(hex)]="rgbLamp:rgb"></ftui-colorpicker>

<!-- HSL color picker for Hue lights -->
<ftui-colorpicker
    [(hue)]="ha:light.bedroom:hs_color[0]"
    [(saturation)]="ha:light.bedroom:hs_color[1]">
</ftui-colorpicker>

<!-- With change event -->
<ftui-colorpicker
    [(hex)]="colorLight:hex"
    @color-change="console.log('New color:', $event.detail.hexString)">
</ftui-colorpicker>Powerful charting component powered by Chart.js.
Supported Chart Types:
- Line chart
- Bar chart
- Radar chart
- Doughnut and Pie chart
- Polar chart
- Bubble chart
- Area chart
- Mixed types
| Attribute | Description | Type | Default |
|---|---|---|---|
| title | Chart title | String | "" |
| type | Chart type | String | "line" |
| width | Chart width | String | "" |
| height | Chart height | String | "" |
| unit | Time unit | "day" | "hour" | "minute" |
"day" |
| offset | Time offset | Number | 0 |
| prefetch | Data prefetch amount | Number | 0 |
| extend | Extend data range | Boolean | false |
| noscale | Disable auto-scaling | Boolean | false |
| no-y | Hide Y-axis | Boolean | false |
| no-y1 | Hide secondary Y-axis | Boolean | false |
| no-x | Hide X-axis | Boolean | false |
| y-min | Y-axis minimum | Number | 0 |
| y-max | Y-axis maximum | Number | 0 |
| y1-min | Y1-axis minimum | Number | 0 |
| y1-max | Y1-axis maximum | Number | 0 |
| y-label | Y-axis label | String | "" |
| y1-label | Y1-axis label | String | "" |
| Attribute | Description | Type | Default |
|---|---|---|---|
| label | Data series label | String | "" |
| type | Chart type override | String | "line" |
| fill | Fill under line | Boolean | false |
| hidden | Hide series | Boolean | false |
| background-color | Fill color | Color | "" |
| border-color | Line/border color | Color | Primary color |
| border-width | Line width | Number | 1.2 |
| point-radius | Point size | Number | 2 |
| log | FHEM DbLog device | String | "-" |
| file | Log file type | String | "-" |
| spec | Reading specification | String | "4:.*" |
| unit | Data unit | String | "°C" |
| start-date | Start date | Date | "" |
| end-date | End date | Date | "" |
| update | Update trigger | String | "" |
| tension | Line curve tension | Number | 0.0 |
| stepped | Stepped line | Boolean | false |
| y-axis-id | Y-axis assignment | Number | 0 |
Examples:
<!-- Simple temperature chart -->
<ftui-chart title="Temperature History" height="300px">
    <ftui-chart-data
        label="Living Room"
        log="DBLogDevice"
        file="history"
        spec="TempSensor:temperature"
        border-color="red"
        fill>
    </ftui-chart-data>
</ftui-chart>

<!-- Multi-series chart with auto-update -->
<ftui-chart title="Climate Data" type="line" height="400px">
    <ftui-chart-data
        label="Temperature"
        log="DBLog"
        file="history"
        spec="Climate:temperature"
        unit="°C"
        border-color="orange"
        [update]="Climate:temperature:time">
    </ftui-chart-data>

    <ftui-chart-data
        label="Humidity"
        log="DBLog"
        file="history"
        spec="Climate:humidity"
        unit="%"
        border-color="blue"
        y-axis-id="1">
    </ftui-chart-data>
</ftui-chart>

<!-- Mixed chart types -->
<ftui-chart title="Energy Consumption">
    <ftui-chart-data
        label="Daily Usage"
        type="bar"
        log="DBLog"
        file="history"
        spec="Power:daily"
        background-color="green">
    </ftui-chart-data>

    <ftui-chart-data
        label="Average"
        type="line"
        log="DBLog"
        file="history"
        spec="Power:average"
        border-color="red"
        tension="0.4">
    </ftui-chart-data>
</ftui-chart>Display icons from the built-in icon library.
| Attribute | Description | Type | Default |
|---|---|---|---|
| type | Icon type | String | "" |
| path | Icon path | String | "" |
| name | Icon name | String | "" |
| color | Icon color | Color name | "" |
| rgb | RGB color value | String | "" |
| size | Icon size | Number | String | 0 |
| height | Icon height | String | "" |
| width | Icon width | String | "" |
| rotate | Rotation in degrees | Number | 0 |
When size is a number, it maps to font sizes from 0.125em to 12em.
Examples:
<!-- Simple icon -->
<ftui-icon name="lightbulb" color="yellow" size="3"></ftui-icon>

<!-- Dynamic icon based on state -->
<ftui-icon
    [name]="lamp:state | map('on:lightbulb-on,off:lightbulb')"
    [color]="lamp:state | map('on:yellow,off:gray')"
    size="4">
</ftui-icon>

<!-- Rotated icon -->
<ftui-icon name="arrow-up" rotate="45" color="primary" size="2"></ftui-icon>Build complex layouts with Row, Column, and Cell components using a flexible CSS Flexbox-based system.
<ftui-row>- Horizontal container (flex-direction: row)<ftui-column>- Vertical container (flex-direction: column)<ftui-cell>- Generic flexible container for content grouping<ftui-grid>+<ftui-grid-tile>- Responsive grid system with tile positioning
All layout components support:
| Attribute | Values | Description |
|---|---|---|
align-items |
left, right, top, bottom, center, around, stretch |
Flexbox alignment control |
margin |
CSS value (e.g., "1", "1em", "0 0 0 10px") |
Outer spacing |
padding |
CSS value | Inner spacing |
width |
CSS value (e.g., "50%", "200px") |
Component width |
height |
CSS value (e.g., "70%", "600px") |
Component height |
gap |
CSS value (e.g., "0.5") |
Spacing between child elements |
Basic Row Layout - Horizontal button arrangement:
<ftui-row align-items="stretch">
  <ftui-button [(value)]="device1">Device 1</ftui-button>
  <ftui-button [(value)]="device2">Device 2</ftui-button>
  <ftui-button [(value)]="device3">Device 3</ftui-button>
</ftui-row>
Nested Row & Column - Multi-room light controls:
<ftui-row>
  <ftui-column>
    <ftui-row>
      <ftui-label text="Living Room"></ftui-label>
      <ftui-button shape="circle" [(value)]="room1">
        <ftui-icon name="lightbulb"></ftui-icon>
      </ftui-button>
    </ftui-row>
    <ftui-row>
      <ftui-label text="Kitchen"></ftui-label>
      <ftui-button shape="circle" [(value)]="room2">
        <ftui-icon name="lightbulb"></ftui-icon>
      </ftui-button>
    </ftui-row>
  </ftui-column>
  <ftui-column>
    <ftui-row>
      <ftui-label text="Bedroom"></ftui-label>
      <ftui-button shape="circle" [(value)]="room3">
        <ftui-icon name="lightbulb"></ftui-icon>
      </ftui-button>
    </ftui-row>
  </ftui-column>
</ftui-row>
Column with Alignment - Sensor data display:
<ftui-row>
  <ftui-column align-items="left" margin="1">
    <ftui-label text="Thermostat"></ftui-label>
    <ftui-label text="Radiator"></ftui-label>
    <ftui-label text="Heater"></ftui-label>
  </ftui-column>
  <ftui-column align-items="left" margin="1">
    <ftui-label [text]="device:temp1" unit="°C"></ftui-label>
    <ftui-label [text]="device:temp2" unit="°C"></ftui-label>
    <ftui-label [text]="device:temp3" unit="°C"></ftui-label>
  </ftui-column>
</ftui-row>
Cell for Content Grouping - Weather display with gap spacing:
<ftui-cell align-items="left" gap="0.5">
  <ftui-label color="medium" size="1">Temperature</ftui-label>
  <ftui-label [text]="weather:temp | fix(1)" unit="°" size="8" thin></ftui-label>
</ftui-cell>
<ftui-cell align-items="left" margin="1em 0 0" gap="0.5">
  <ftui-label color="medium">Rain</ftui-label>
  <ftui-label [text]="weather:rain" size="3" unit="mm" thin></ftui-label>
</ftui-cell>
Responsive Height - Full-height column:
<ftui-column height="70%">
  <ftui-button>Button 1</ftui-button>
  <ftui-button>Button 2</ftui-button>
</ftui-column>- Nesting: Freely nest Row inside Column and vice versa for complex layouts
- Alignment: Use
align-items="around"for evenly distributed spacing - Margins: Support CSS shorthand:
margin="1"(all sides) ormargin="0 0 0 10px"(top right bottom left) - Mobile: Combine with
<ftui-view>components for mobile-optimized interfaces
Explore the full capabilities of FTUI with these live examples:
- Tab - Tabbed navigation
- Grid - Responsive grid layouts
- Circlemenu - Circular menu navigation
- Button - Buttons and interactions
- Knob - Rotary controls
- Slider - Linear sliders
- Checkbox - Toggle controls
- Dropdown - Selection menus
- Colorpicker - Color selection
- SegmentedButton - Multi-option buttons
- Chart - Data visualization
- Popup - Modal dialogs
- Swiper - Touch carousels
- Medialist - Media galleries
- Departure - Transit information
- Speak - Text-to-speech
- View (Plain) - Basic mobile interface
- View (Full) - Complete mobile UI (FHEM-only public example)
- Home Assistant - Dedicated Home Assistant example
- Home Assistant (Basic) - Generic HA grid example
- Home Assistant (Mobile) - Generic HA mobile example
Files prefixed with _ are private/local dashboard variants and are intentionally not part of the public example set.
Backend Connection Errors:
- Verify FHEM/Home Assistant is running and accessible
- Check CORS settings for Home Assistant
- Ensure access token is valid and has appropriate permissions
- Check network connectivity between client and server
Components Not Rendering:
- Open browser console (F12) to check for JavaScript errors
- Verify component names are correctly spelled
- Ensure all required attributes are provided
- Check that backend prefix (
ha:) is used correctly
Updates Not Working:
- Clear browser cache
- Verify reading names match your FHEM/HA configuration
- Check that bindings use correct syntax
[attribute]="device:reading" - Ensure FHEM DbLog is properly configured for chart components
Contributions are welcome! If you'd like to contribute:
- Fork the repository
- Create a feature branch
- Make your changes
- Test thoroughly
- Submit a pull request
Report bugs and feature requests on the GitHub Issues page.
Support the continued development of this versatile UI framework:

Many thanks to all donors and contributors!
This project is licensed under the MIT License.
- Documentation: GitHub Pages
- Source Code: GitHub Repository
- Issues: Bug Reports & Feature Requests
- FHEM Forum: FHEM Community
Built with ❤️ for the FHEM and Home Assistant communities