Trouble Shooting
Table of Contents
- Known limitation: Support for custom fields that have been added via UI (no AOT elements)
- Known limitation: Missing support for custom security artifacts that have been added via UI (no AOT elements)
- Error symptom: "Waiting for the SYS workload initial sync to complete ... This is taking a long time. Then error (Authentication failure)"
- Error symptom: Installing workloads on hub failed. Unhandled exception 500. "An exception occured when invoking the operation - Cannot create a record in Azure Active Directory applications (SysAADClientTable). Name: ScaleUnits, Admin. The record already exists."
- Error symptom "The SSL connection could not be established, see inner exception", with the inner exception looking like "The remote certificate is invalid according to the validation procedure."
- Known issue: Upload sessions fail in LCS Cloud-hosted dev boxes for
EcoResProductDimensionGroup - Known issue: Initial upload session fails for SYS in Spoke
- Known issue: Stuck during drain/start
Custom fields refer to fields created through personalization using this feature. Custom field support for the hybrid topology was included in SCM build 10.0.17. Support will be added in build 10.0.18.
Workaround in SCM build 10.0.17:
- Query the table: METADATAEXTENSIONTABLE. Work with Microsoft for getting the list. Custom fields will be observable in the hub because of the backup restore.
- Go to the same form on the scale unit environment and create the custom fields manually with the same name. (without the _Custom suffix – that is added automatically)
Known limitation: Missing support for custom security artifacts that have been added via UI (no AOT elements)
Custom security artifacts refer to roles/duties/privileges created directly from the UI, without adding them to AOT. Support for these artifacts was not included in SCM build 10.0.17 and will be added in build 10.0.18.
Workaround in SCM build 10.0.17:
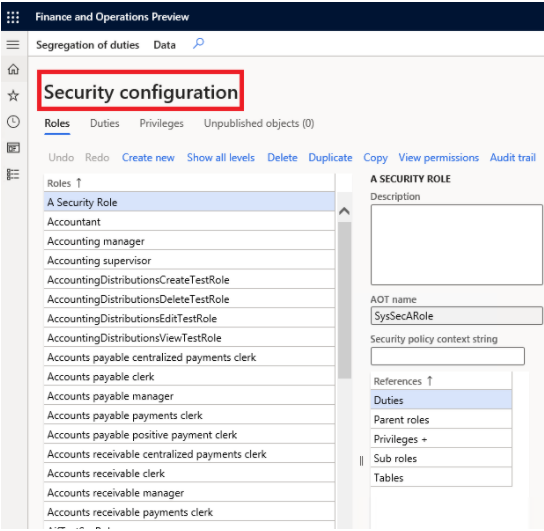
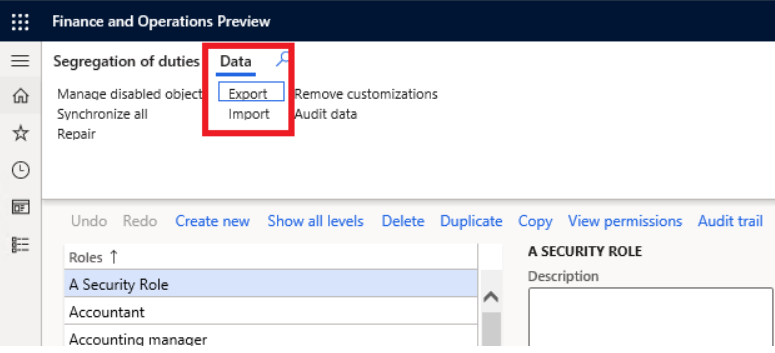
Export all security configuration from the UI on the hub environment and import on the scale unit.
Note: Only roles necessary for executing tasks in the scale unit are expected to be synchronized from the hub to the scale unit.
Use the environment URL on the hub in the following pattern: (environment URL)/?cmp=DAT&mi=SysSecConfiguration
Error symptom: "Waiting for the SYS workload initial sync to complete ... This is taking a long time. Then error (Authentication failure)"
If you have tried with a previous version to deploy workloads the installation of the certificates for the IIS service might not have succeeded.
After running step “Initialize the hybrid topology” and before running the step “Configure the environments” , the certificate must be manually installed into the trusted root store of the respective machine.
The steps are the following in brief:
-
- Open the IIS configuration and identify the certificate name that has been assigned to IIS
- Identify the same certificate in the machines certificate store
- Export the certificate
- Import the certificate again on the same machine but into the "Trusted Root Certification Authorities"
Here is the step by step sequence in detail:
- Identify the certificate in the IIS Manager on the server. Expand the IIS server node on the Connections panel, and then expand the Sites folder. Right click on the 'AOSService' node and select the "Edit Bindings ..." option. A list of bindings shows in a dialog "Site Bindings". Select the binding from the list (there should be only one) and click Edit to identify the certificate name in the field "SSL certificate".
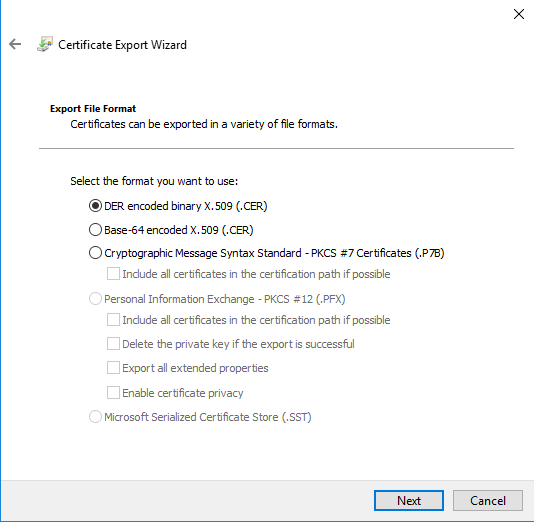
- Run the certlm.msc utility and locate the AX certificate under Personal > Certificates. Identify the certificate with the identified name. Double click on the certificate. If the certificate information indicated that it is not trusted trusted (in text and by the red cross in the icon), then the certificate must be added to the trusted certificates. Right click on the certificate click on the All tasks option, and select "Export...". In the wizard that opens click Next until you are asked to provide a name for the exported certificate. Provide a file name, and then click next and finish.
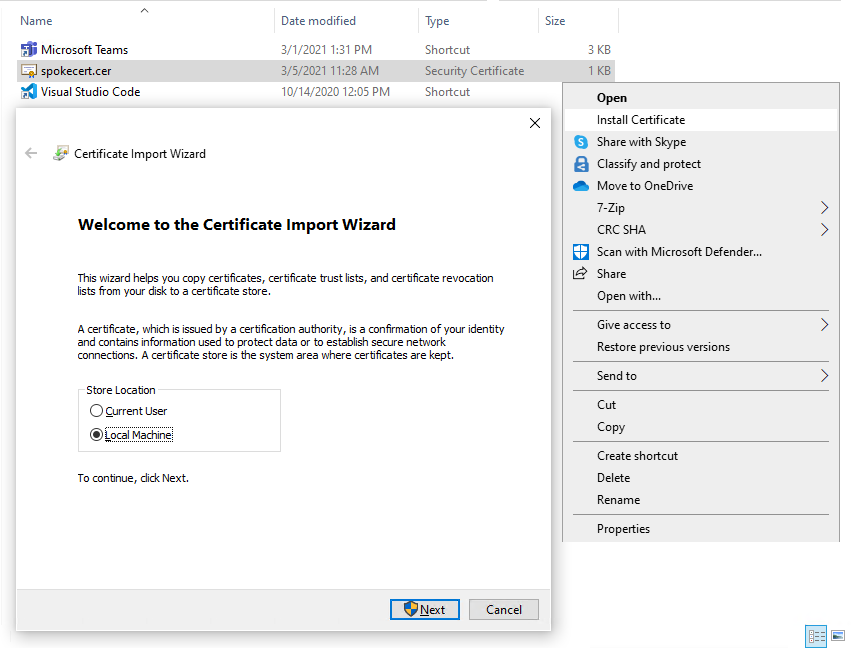
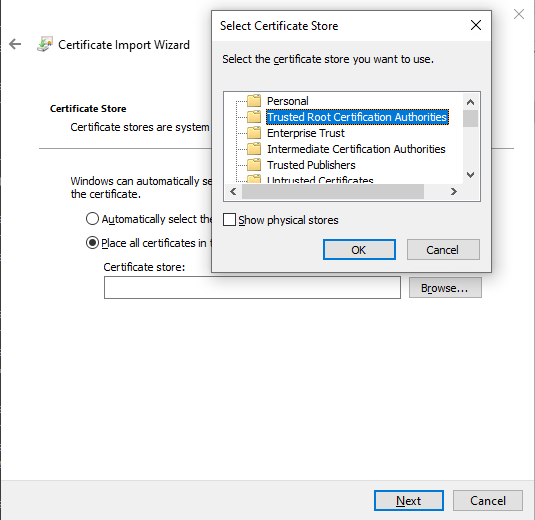
- Locate the exported certificate and double click it. In the dialog that opens click the Install certificate button. Select Local machine and click Next. Then select the "Place all certificates in the following store" option and select the "Trusted Root Certification Authorities" Click Next and then Finish.
Error symptom: Installing workloads on hub failed. Unhandled exception 500. "An exception occured when invoking the operation - Cannot create a record in Azure Active Directory applications (SysAADClientTable). Name: ScaleUnits, Admin. The record already exists."
This typically indicates that the entry you have made for the Active directory applications in the configuration file UserConfig.xml is not correct. Please make sure you have entered the correct Application Id and a certificate secret of into the InterAOSAppId configuration settings in the file. The certificate must be valid. Open your F&O environment and navigate to the page with your environment URL https://YOUR_HUB_ENVIRONMENT_URL/?cmp=DAT&mi=SysAADClientTable. If you do not see an entry for the application ID for the application of your InterAOSAppID, you can enter a respective record with that.
Error symptom "The SSL connection could not be established, see inner exception", with the inner exception looking like "The remote certificate is invalid according to the validation procedure."
This might happen if the client (the machine that is running this application) doesn't have the server's (either of the machine you're setting up as Hub or Spoke) public certificate installed. To mitigate, you need to export the public key certificate from your server and install it in the "Trusted Root Certification Authorities".
- On your server (hub or spoke), open Run and type in
mmc.exeto open the "Microsoft Management Console", and add the "Certificates" snap-in (which will manage certificates for a "Computer account")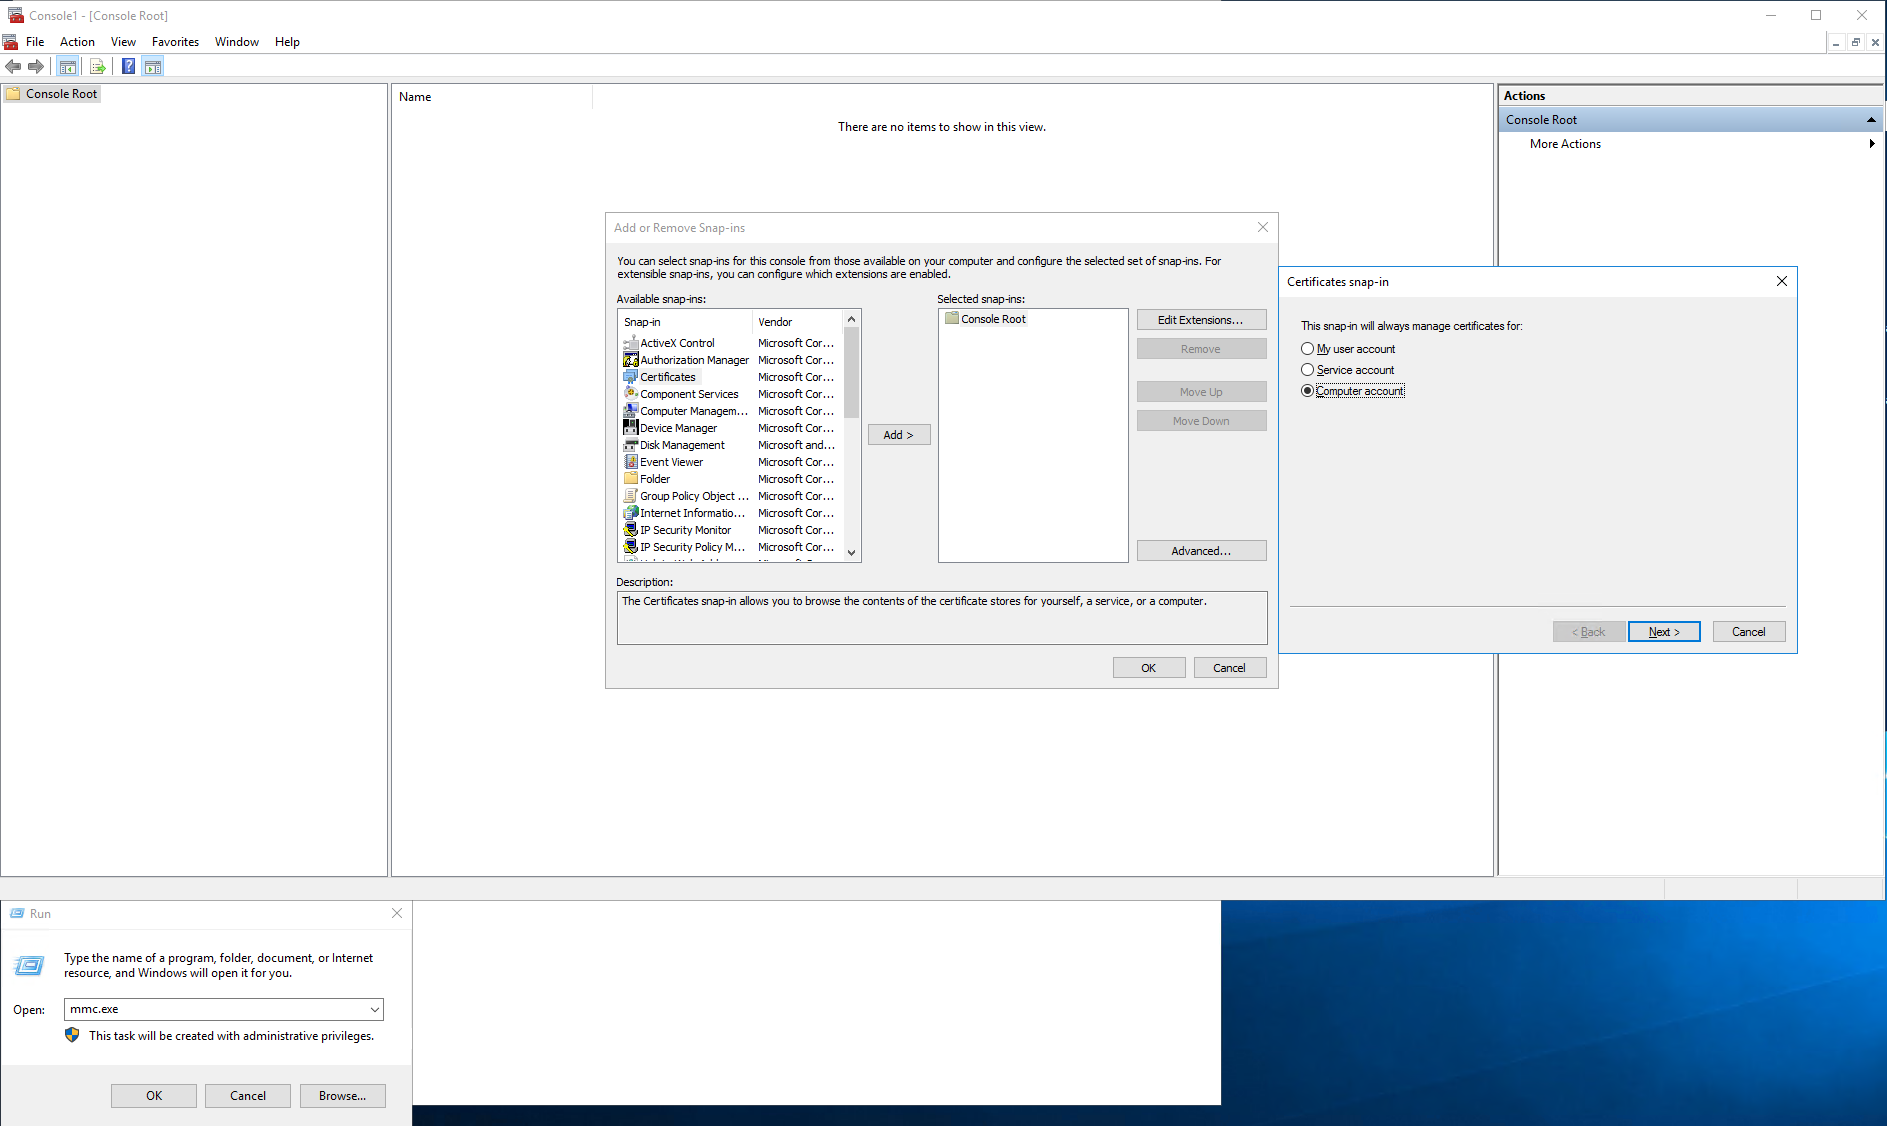
- Under "Personal\Certificates", select your server's developments certificate, right click and export

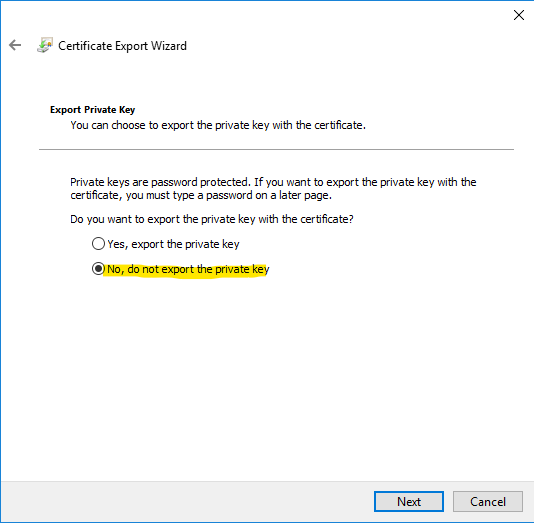
- Export it without the private key, in a
.CERformat
- Copy the resulting file into your client machine and install it under "Local Machine". Select "Place all certificates in the following store" and choose "Trusted Root Certification Authorities"
Once you have the public key certificate installed on your client, you should not get the exception any more.
For some reason, Retail (Commerce) data is seeded in empty-DB cloud-hosted developer machines in LCS, this causes data sync errors during data upload in SCM Scale Units.
To mitigate the issue, check if the row in EcoResProductDimensionGroup is 'Retail Kit' and if so truncate the table before Resetting the failed upload sessions.
We're investigating this issue internally and will try to stop cloud-hosted developer machines from seeding Retail data.
If the initial sync of SYS fails in Spoke (RetailCDXUploadSession) with errors like 'Duplicate' for the below tables, just clear them out in the Spoke and Reset the package (set TryCount = 0 in SQL or click the button from the menu item of the same name).
Delete from NumberSequenceTable
Delete from NumberSequenceReference
Delete from NumberSequenceScope
Delete from FeatureManagementMetadata
Delete from FeatureManagementState
Delete from SysFeatureStateV0
This issue occurs if you login and move around forms on the Spoke before initial SYS workload is fully synchronized (the moving around forms will auto generate bad records).
If you have many workload instances deployed, you can end up in a situation where draining or starting all workloads pegs the Batch node(s).
Make sure to set MaxBatchSessions to N+1, where N is the number of workload instances deployed:
Update batchserverconfig set maxbatchsessions = 8From version 3.15 of the tool and forward, this is included in the initialization step, which automatically sets the MaxBatchSessions to 16.